SVG Sticky Shapes
How can we create SVGs with a sticky effect when they are brought close to each other? In this content, we will explain this in the simplest way possible. The purpose of this content is not to make you do it exactly, but to learn an approach on how to do it. So instead of memorizing what to do technically, try to learn how you can achieve such a thing. You can drag the shapes in the content to observe the sticky effect better.
First, we draw a simple example to understand the concept and what we need to do. This way, we can identify the data we will need to create this effect and how to obtain them. As seen in the following illustration, we need four points and their coordinates to create the sticky effect.
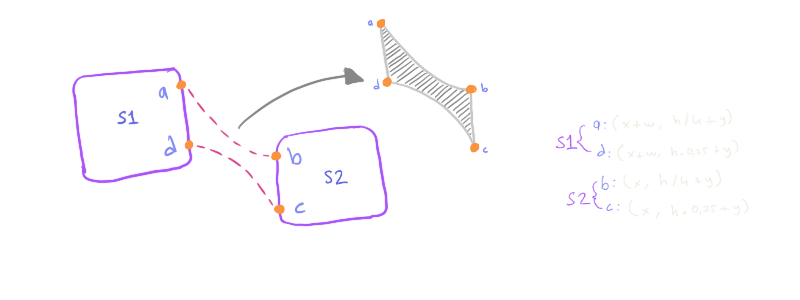
- a: (S1.x + S1.width, S1.height * 0.25 + S1.y)
- b: (S2.x,S2.height * 0.25 + S2.y)
- c: (S2.x,S2.height * 0.75 + S2.y)
- d: (S1.x + S1.width, S1.height * 0.75 + S1.y)
Next, we will utilize SVG Path commands to create a path that connects these points. For this, we need to use the Move, Line, and Arc commands. If you are not familiar with these commands, you can browse the article of SVG Path Commands.
a: (119, 105)b: (181, 160)d: (119, 155)c: (181, 200)
Now, using the values we have found, we can create the elastic shape between the two shapes. If we continuously update the values based on the positions of the shapes, we can observe that the elastic shape also gets updated when we drag the shapes.

You can join the newsletter to be notified of awesome interactive articles and courses about software, design and AI. You will receive at most a few emails per month.